Fake News Detection with Python
Simple fake news detection project with sklearn

Simple fake news detection project with sklearn
In this article I will be showing you how to accomplish simple Fake News Detection with sklearn library. This project is targeted to beginners.
It is best when this project is done with Jupyter Notebook/ Jupyter Lab but any relevant ide/editor is recommended
Getting Started
Let's start with installing necessary librariespip install sklearn
pip install numpy
pip install pandas
Not let's download dataset from Kaggle for the project
Link: http://bit.ly/fnd-dataset
Getting into Data
Now let's import necessary libraries for projectimport pandas as pd
import numpy as np
from sklearn.model_selection import train_test_split
from sklearn.metrics import classification_report
import re
import string
Now let's get our datafake_news = pd.read_csv('Fake.csv')
true_news = pd.read_csv('True.csv')
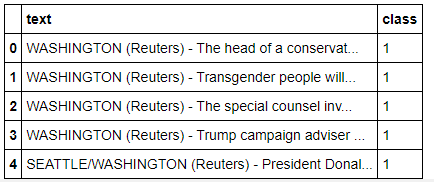
Now let's explore our datafake_news.head()

true_news.head()

Now let's look into size of our datatrue_news.shape,fake_news.shape# output -->((21417, 4), (23481, 4))
Let's assign numeric values 0 and 1 numeric values to represent fake news and true news respectively.fake_news['class']=0
true_news['class']=1
Separating Data for Manual Testing
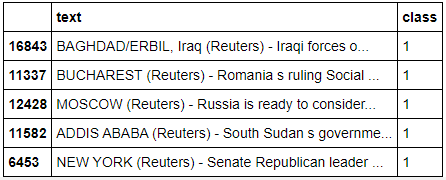
Now let's separate data for more intuitive manual testingmanual_testing_fake = fake_news.tail(10)
manual_testing_true = true_news.tail(10)
Let's remove data that was separated for manual testing from original datafor i in range(23470,23481,1):
fake_news.drop([i],axis=0,inplace=True)
for i in range(23406,23417,1):
fake_news.drop([i],axis=0,inplace=True)
Now let's save data as csv for future usemanual_testing=pd.concat([manual_testing_true,manual_testing_fake],axis=0)
manual_testing.to_csv("manual_testing.csv")
Data Preprocessing
Now let's concatenate data.merged_data = pd.concat([true_news,fake_news],axis=0) merged_data.head()

Let's remove not necessary columns for efficient and easy processing.required_df = merged_data.drop(["title","subject","date"],axis=1)
required_df.head()
Now let's shuffle our datarequired_df = required_df.sample(frac=1)
required_df.head()
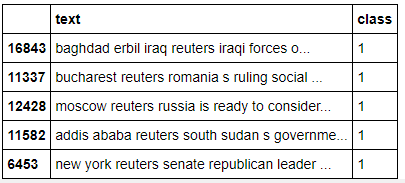
Now let's clean our data. All punctuations and unnecessary characters including website links mean nothing to the data so they are removed before further processing.def remove_un(data):
data = data.lower()
data = re.sub('\[.*?\]','',data)
data = re.sub('\\W',' ',data)
data = re.sub('https?://\S+|www.\S+','',data)
data = re.sub('<.*?>+','',data)
data = re.sub('[%s]'%re.escape(string.punctuation),'',data)
data = re.sub('\n','',data)
data = re.sub('\w*\d\w','',data)
return datarequired_df['text']= required_df['text'].apply(remove_un)
required_df.head()
Vectorization
Vectorization is process of mapping our natural language into numerical values which is used to make predictions using different machine learning algorithms.
Let's make two variables that represent independent and depend variables in numerical calculations. Linear equation represented by y=mx+c is used during internal calculation.x = required_df['text']
y = required_df['class']
Now let's split training and testing datax_train, x_test, y_train,y_test=train_test_split(x,y,test_size=0.25)
We will be using TfidfVectorizer for this project. Other similar vectorizers like seq_to_seq can also be used.from sklearn.feature_extraction.text import TfidfVectorizervectorization = TfidfVectorizer()
xv_train = vectorization.fit_transform(x_train)
xv_test = vectorization.transform(x_test)
Training Model
Logistic Regression
For this particular project we will be using logistic regression for training and testing.
Let's start by importing libraryfrom sklearn.linear_model import LogisticRegression
Training modelLR = LogisticRegression()
LR.fit(xv_train,y_train)
Testing model’s performanceLR.score(xv_test,y_test)

The model trained with Logistics Regression is found to be 98+% accurate.
Now let's look deeper into performance with testing data and compare with our original modelpred_LR = LR.predict(xv_test)
print(classification_report(y_test,pred_LR))
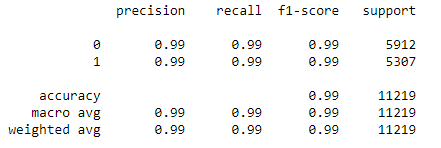
The model is found to be almost 99% accurate with the above model
Same kind of training and testing can be done using other different models. You can follow the link to original GitHub link for other classification algorithms. This GitHub includes following algorithms
- Decision Tree Classification
- Gradient Boosting Classifier
- Random Forest Classifier

Manual Testing
Now let's look into manual testing which is more intuitive and interactive.def output_label(n):
if n ==0:
return "Fake News"
elif n==1:
return "True News"
else:
return "ERROR!!"
def manual_testing(news):
testing_news = {"text":[news]}
new_def_test = pd.DataFrame(testing_news)
new_def_test['text'] = new_def_test['text'].apply(remove_un)
new_x_test = new_def_test['text']
new_xv_test = vectorization.transform(new_x_test)
pred_LR = LR.predict(new_xv_test)
pred_DT = DT.predict(new_xv_test)
pred_GBC = GBC.predict(new_xv_test)
pred_RFC = RFC.predict(new_xv_test)
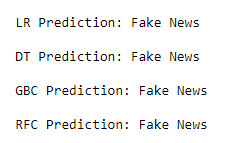
return print(f'''\n
LR Prediction: {output_label(pred_LR)}\n
DT Prediction: {output_label(pred_DT)}\n
GBC Prediction: {output_label(pred_GBC)}\n
RFC Prediction: {output_label(pred_RFC)}\n
''')
Getting input text from user and predicting classificationnews = input("News Here")
manual_testing(news)


This project is based on learning progress of mine with the help of video tutorial by yobots