Face Detection with OpenCV for beginners.
Python has and its huge libraries have made machine learning and data science very easy to learn and perform. Face recognition has become…
Python has and its huge libraries have made machine learning and data science very easy to learn and perform. Face recognition has become one of the coolest way to do python projects. In this tutorial I will be guiding you through a simple face detection (don’t be confused with face recognition).
Setting up
Let's begin with setting up the virtual environment.$ pipenv shell
Once our virtual environment has been setup, we can now proceed to install libraries required$ pipenv install opencv-python
Implementation
We will be using Haarcascades data sets to detect the face in the frame. Download the data sets from here to the directory we are working on.
Now let's start coding
We will be importing cv2 and getting the trained dataset i.e. Haarcascades datasets. I have named the file to frontal-face-data.xml you can name is as you like.
We will be using our live webcam feed to detect faces. So VideoCapture() function is called. The argument 0in function denotes default webcam you can use existing video file by giving file path eg. 'video.mp4.
As video is continuous photos and we will be using video from webcam the detection process should run every given interval of time. Here frame_read is a Boolean that returns true or false depending on change in video feed. frame stores the current frame(image)of the video.
Haarcascades uses greyscale image to detect the face, so we will be turing out frame to greyscale.
Now we will draw a rectangle around the face. We will be using the detectMultiScale function to detect the faces seen in the canvas. And accordingly, when faces are detected, we will draw a colored rectangle around the face. x,y is the coordinates of top left corner of the rectangle and w,h are the width and height of the rectangle.
We will bw using rectangle() function to draw the rectangle around the face. It takes frame(image), coordinates, color and outline width as arguments
Now let's show the video. OpenCV has a function iamshow() to display the image/video which takes canvas name and frame(image) as argument. And waitKey is used to key down once the previous canvas has been displayed to change the frame. It takes arguments in milliseconds to change frame in that interval.
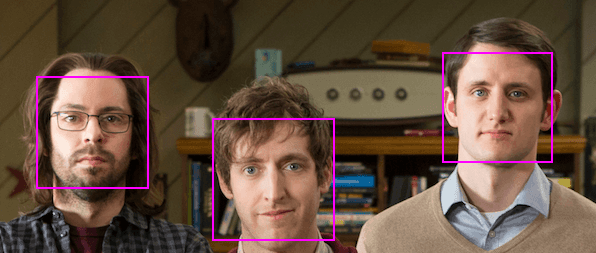
In action
Now let's run the script and see how does it perform.$ python [filename].py
Full Source Code